To use a serger, set it up by selecting the right thread type and adjusting the tension according to your fabric—lighter fabrics need lower tension, while heavier ones require more. Keep the stitch width and length suitable for your project, and guide your fabric steadily through the machine. Practice with scrap pieces to get comfortable with settings. Sticking to these basics guarantees neat, professional finishes, and exploring further can help you master advanced techniques.
Key Takeaways
- Understand your fabric type and select appropriate thread and tension settings accordingly.
- Adjust stitch width, length, and tension controls for smooth, professional seams.
- Load and thread the serger correctly, ensuring proper threading paths and tension distribution.
- Use the right stitch type for your project, such as overlock or rolled hem, based on fabric and finish desired.
- Practice on scrap fabric to fine-tune settings and achieve neat, durable seams before sewing your project.
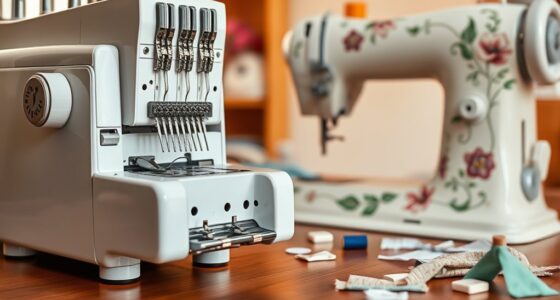
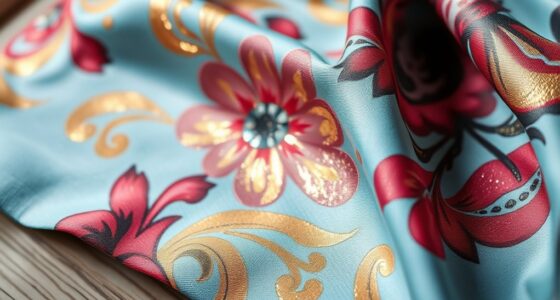
Have you ever wondered how professional-looking seams and finishes are achieved so quickly? The secret often lies in using a serger, or overlock machine, which streamlines the sewing process and creates clean, durable edges. When you start exploring serger sewing, understanding fabric types and thread selection becomes essential. Different fabrics demand different handling, and choosing the right thread ensures your seams are strong and neat. For lightweight fabrics like chiffon or silk, you’ll want a fine, high-quality polyester or nylon thread that glides smoothly through delicate fibers. Heavyweight fabrics, such as denim or canvas, require thicker, more robust threads—often polyester or polyester-cotton blends—that can withstand tension and wear. Selecting the appropriate thread not only improves the appearance but also enhances the longevity of your finished project.
Getting familiar with fabric types helps you adjust your serger settings for ideal results. For lightweight fabrics, you might need to reduce the tension to prevent puckering and use narrower stitch widths. Conversely, with thicker or stretch fabrics, increasing the tension and stitch length can accommodate the bulk and maintain elasticity. The key is to match your fabric to the right stitch type and tension settings on your serger. Many sergers have adjustable features that allow you to fine-tune stitch width, length, and tension, giving you control over the finishing process. When you understand the characteristics of your fabric, you can set your machine accordingly, making the sewing smoother and more efficient. Additionally, staying informed about AI security developments can help you protect your sewing projects and digital patterns from cyber threats.
Top picks for "serger overlock machine"
Open Amazon search results for this keyword.
As an affiliate, we earn on qualifying purchases.
Frequently Asked Questions
Can I Use a Serger for Quilting Projects?
Yes, you can use a serger for quilting projects. It’s great for creating clean, durable quilt seam techniques, especially on quilting fabric choices that are thick or layered. Keep in mind, a serger isn’t ideal for all quilting details, but it speeds up finishing edges and adding decorative seams. Use it alongside your regular sewing machine to achieve professional-looking results and enhance your quilting projects effortlessly.
How Do I Troubleshoot Tension Issues on My Serger?
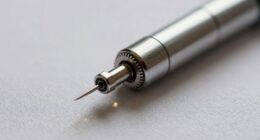
To troubleshoot tension issues on your serger, start by checking the thread tension settings and verify they match the fabric you’re using. If stitches are uneven or puckering, try adjusting the tension dials incrementally, one at a time. Make sure your threads are properly threaded through all guides and the tension disks. Regularly clean and oil your machine, and replace old needles to maintain smooth tension and stitching quality.
What Fabrics Are Best Suited for Serger Sewing?
Think of your serger as a dance partner that thrives on stretch fabric and durability. Knits and jersey fabrics are perfect, offering stretch and resilience. Lightweight cottons and linens work well too, providing a clean, professional finish. Avoid delicate silks or heavy denim, which can cause tension issues. With the right fabrics, your serger will deliver strong seams and a polished look, making your sewing projects more successful and enjoyable.
Is It Possible to Convert a Serger Into a Regular Sewing Machine?
You can’t easily convert a serger into a regular sewing machine because of machine modifications and accessory compatibility issues. Sergers are designed specifically for overlocking, with different mechanisms and threading systems. Attempting modifications can damage the machine or void warranties. If you need both functions, consider investing in a combo machine or using separate machines, since converting a serger isn’t practical or recommended for quality sewing results.
How Do I Maintain and Clean My Overlock Machine?
Did you know regular cleaning can double your overlock machine’s lifespan? To maintain it, you should regularly lubricate the machine according to the manufacturer’s instructions and keep the thread path clear of lint and debris. Use a soft brush or compressed air for cleaning, and check the tension and blades periodically. This simple routine guarantees your overlock machine runs smoothly and stitches beautifully every time.
Conclusion
Now that you’ve learned to tame your overlock machine, you’re ready to weave magic into your sewing projects. Think of your serger as a trusted compass, guiding you through the tangled threads of creativity. Each stitch is a step closer to perfection, transforming raw fabric into a masterpiece. Embrace your new skill, and let your serger be the steady heartbeat of your sewing journey—your craft’s guiding light shining brighter with every seam.