Textile Art
What Is a Textile Art? The Complete Guide!
Craft intricate masterpieces with fabric in textile art, blending tradition with innovation for a mesmerizing creative journey.
Immerse yourself in textile art, where fabric is your creative medium. Explore weaving, knitting, crocheting, embroidery, and quilting techniques to create beautiful pieces. Learn how color theory can enhance your storytelling. Use upcycled materials for unique projects and choose high-quality supplies for impactful results. Dive into the world where art and craft intersect, shaping a new generation of artists. Discover the interplay between traditional roots and modern influences, creating a canvas rich with heritage and innovation. Expand your skills in textile art as you explore techniques, tips, and inspirational artwork.
Key Takeaways
- Fabric is the primary medium in textile art, using techniques like weaving, knitting, and embroidery.
- Color theory is crucial for evoking emotions and narratives in textile art.
- Upcycling materials is common in textile art projects for sustainability.
- Quality supplies are essential for impactful textile art pieces.
- Influential figures like Anni Albers and Ann Sutton shape the field of textile art.
Textile Art Overview
Textile art offers an alluring blend of tradition and innovation, showcasing a diverse range of techniques and styles that have evolved over centuries. Fabric serves as the primary medium in textile art, with artists exploring various techniques such as weaving, knitting, crocheting, embroidery, and quilting to create stunning pieces of art.
Color theory plays a pivotal role in textile art, allowing artists to evoke emotions and convey narratives through the strategic use of colors.
When creating textile art projects, artists often upcycle materials to give new life to old fabrics, incorporating sustainable practices into their work. Choosing the right supplies is essential in textile art, as the quality of materials can greatly impact the final piece.
Key Figures in Textile Art
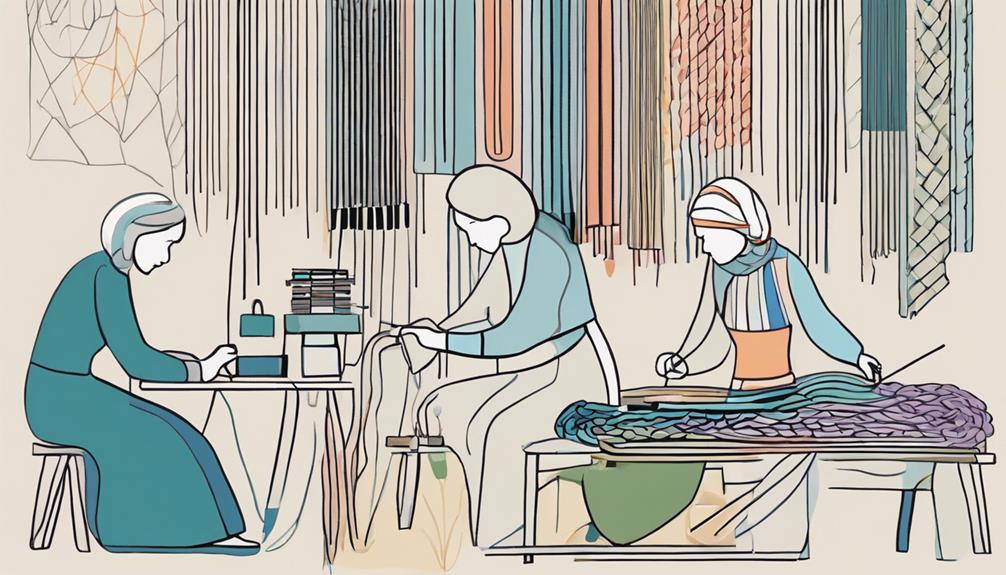
You'll explore influential textile artists who've shaped the field and understand the contrast between modern and traditional influences.
These key figures have left a lasting impact on the evolution of textile art, inspiring a new generation of artists to push boundaries and redefine the relationship between art and craft.
Get ready to discover how these artists have redefined the boundaries of textile art through their innovative techniques and creative vision.
Influential Textile Artists
In the world of influential fabric artists, Anni Albers stands out as a pivotal figure who transformed the intersection of art and craft through her innovative use of materials and techniques. Albers' book and reference resources have inspired countless artists to explore new horizons in fabric art.
Her workshop photos showcase her mastery of techniques and projects, illustrating the depth of her understanding of color theory and material manipulation. Additionally, Albers' emphasis on upcycling materials and utilizing sustainable supplies has had a lasting impact on the fabric art community.
Another notable figure in the domain of fabric art is Ann Sutton, a contemporary artist who pushes the boundaries of traditional techniques. Sutton's work explores the intricacies of color, texture, and form, challenging conventional notions of fabric art.
Through their pioneering approaches, Albers and Sutton have paved the way for a new generation of artists to experiment and innovate in this dynamic field.
Modern Vs. Traditional Influences
Modern and traditional influences collide in the world of textile art, showcasing a dynamic interplay between key figures who redefine boundaries and challenge conventions. Anni Albers stands out for revolutionizing textile art by merging art and craft with innovative materials and techniques, paving the way for contemporary textile artists like Ann Sutton. Sutton, a prominent figure in the field, blurs the lines between art and craft, exploring color, texture, and form in unique ways.
Both modern and traditional influences can be seen in textile art, with examples like Amish quilts and modern art sharing design similarities such as geometric patterns and bold colors. These influences highlight the enduring influence of traditional practices in the work of contemporary artists.
Textile art, with its rich history dating back thousands of years, continues to evolve as modern artists draw inspiration from traditional craftsmanship, creating a vibrant and diverse artistic landscape.
Traditional Vs. Modern Textile Art
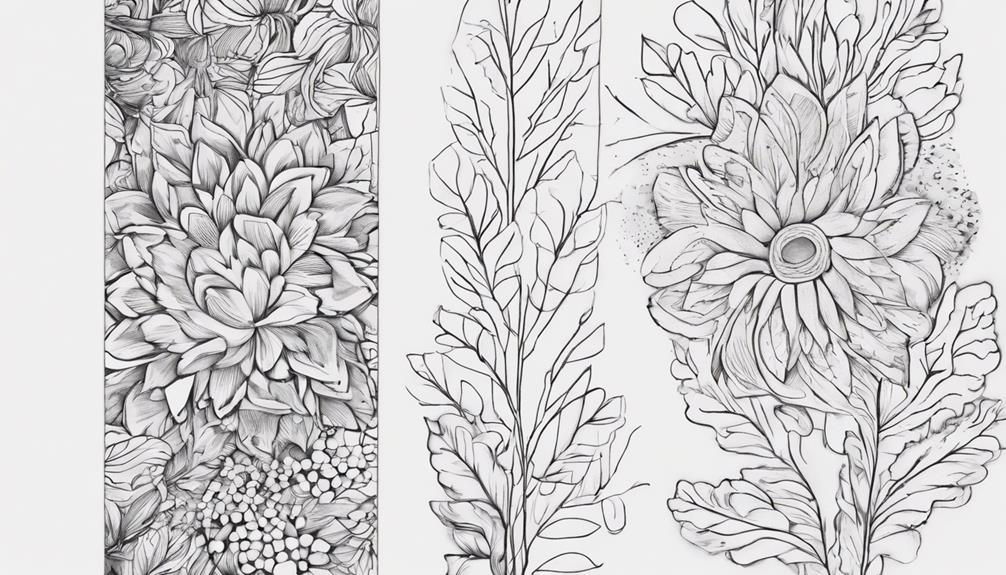
Traditional textile art, such as Amish quilts, showcases geometric patterns and bold colors that have influenced modern artists with their exquisite craftsmanship.
In contrast, modern textile art explores innovative materials and techniques, blurring the boundaries between traditional definitions of art and craft. This evolution reflects the changing landscape of textile art, where artists push the limits of what's considered traditional.
The evolving nature of textile art is evident in how artists now use the medium to address significant issues like environmental concerns and gender equality. The intersection of art and craft in textile art has become a focal point for many creators, with pioneers like Anni Albers and Ann Sutton leading the way with their innovative approaches.
As modern textile art continues to evolve, it remains rooted in the craftsmanship and heritage of traditional techniques while embracing new possibilities for creative expression.
Phaidon's Vitamin Series
Exploring the modern landscape of visual art mediums, Phaidon's Vitamin Series surveys recent developments in artistic expression through specific mediums. This series delves into how artists engage with particular artistic mediums, shedding light on their significance in the art world. By focusing on mediums like clay, ceramic, painting, drawing, and collage, and with contributions from international curators, critics, and museum directors, Phaidon's Vitamin Series provides an inclusive view of the trends in art and artists' application of diverse mediums.
To give you a better insight, here's a glimpse of Phaidon's Vitamin Series:
Artistic Mediums | International Curators | Significance in Art |
---|---|---|
Clay | Jane Smith | Innovative approaches to sculpture and pottery |
Painting | Carlos Martinez | Evolution of painting techniques and styles |
Collage | Anna Chang | Intersection of traditional and digital art |
These books offer an in-depth exploration into contemporary art practices, highlighting the evolving ways artists express their creativity and vision through specific mediums.
Book Reviews and Art Exploration
You'll find a wealth of artistic inspiration through textiles and the exploration of different art forms. These book recommendations for artists offer unique perspectives and insights into the world of art.
Set off on inspiring artistic journeys with diverse perspectives and practical advice from these insightful reads.
Artistic Exploration Through Textiles
Exploring the world of textile art through book reviews and art exploration offers a unique opportunity to discover the intersection of creativity and craftsmanship in a dynamic and enriching way. Here's a glimpse of what you can anticipate when immersing yourself in artistic offerings through textiles:
- 'The Fabergé Girl' by Ina Christova transports you to early 20th-century Saint Petersburg, highlighting the exquisite textile artistry of the renowned Fabergé brand.
- 'The Art Lover's Guide to Barcelona' by Ruby Boukabou reveals Barcelona's vibrant cultural heritage through a tapestry of textile art, inviting you to appreciate the city's artistic offerings.
- 'How to Collect Art' by Magnus Resch explores the intricate world of the art market, shedding light on the textile art pieces worth collecting and providing valuable insights for art enthusiasts.
- These books offer a rich tapestry of perspectives on art appreciation, guiding you in engaging with and collecting textile art while revealing its profound artistic significance in the exploration of art.
Book Recommendations for Artists
For artists seeking inspiration and insights into the art world, these carefully selected book recommendations offer a diverse range of perspectives and expertise.
The 'Complete Photo Guide to Textile Art Techniques' is a must-have for any art quilter or textile enthusiast looking to expand their skills. This extensive guide covers everything from color theory to textile art workshops, providing a wealth of information for both beginners and experienced artists.
If you're interested in incorporating recycled materials into your artwork, 'Altered Textile Books: Fabric Art Techniques' is an excellent resource. This book explores the creative possibilities of upcycling and recycling clothing to create unique and visually striking pieces. It's perfect for artists looking to experiment with new methods and materials.
Whether you're a seasoned art collector or just starting to build your collection, 'How to Collect Art' offers valuable insights into the art market and collecting practices. Written by a New York cultural economist, this book provides a fresh perspective on exploring the world of art collecting.
Inspiring Artistic Journeys
Explore mesmerizing artistic journeys and enrich your understanding of art through insightful book reviews and art exploration. Immerse yourself in a world of creativity and inspiration with these compelling reads:
- 'The Fabergé Girl' by Ina Christova: Step into early 20th-century Saint Petersburg and uncover the enchanting world of Fabergé through this historical narrative.
- 'The Art Lover's Guide to Barcelona' by Ruby Boukabou: Discover Barcelona's cultural richness and artistic gems with this guide tailored for art enthusiasts.
- 'How to Collect Art' by Magnus Resch: Gain valuable insights from a cultural economist on navigating the art market and establishing your art collection.
- Art Exploration Revealed: These books not only provide instructions on collecting art but also delve into diverse art scenes, historical contexts, and practical tips for art enthusiasts.
Allow yourself to be transported into different facets of art appreciation and collecting, reinvigorating your textile art journey.
Book Overview
Within the pages of 'Textile Art: The Complete Guide,' you will discover a wealth of knowledge on fabric alteration and embellishment techniques. This book is considered a must-have for sewists and textile artists, offering a marvelous assortment of projects and serving as a great reference book for creating beautiful textiles. The book covers over 40 techniques step by step, allowing you to let your creativity express and explore different ways to transform fabric. Additionally, it provides an introduction to color theory, helping you make informed decisions in your projects. Here is a quick look at what you can expect from this indispensable reference book:
Highlights | Features | Benefits |
---|---|---|
Great reference book | Suggestions for using resources | Best altered textile book |
Techniques are covered step by step | Intro to color theory | Found new uses |
Recommendations and Reviews
Considered a go-to resource by many in the textile art community, this book has garnered high praise for its user-friendly approach and practical project ideas. If you're a beginning art quilter or someone looking to try something new in the field of textile art, this book is a fantastic choice.
Here's why:
- Received fabric art workshop: The book provides detailed instructions similar to what you'd receive in a fabric art workshop, making it easy to follow along.
- Dozens of ideas using found objects: It showcases several uses for found objects, encouraging you to get creative with materials you might already have.
- Excellent book that combines new and exciting techniques: It's an excellent resource for combining different techniques to create unique textile art pieces.
- Source the items though: While it offers numerous project ideas, you may need to source some items to fully explore the projects.
With its clear instructions and innovative ideas, this book is sure to inspire your textile art journey.
Comparison and Inspiration

When comparing textile art books for inspiration, this book stands out as a top choice for fabric art enthusiasts. It's preferred over others by the same author, making it a recommended starting point for those interested in exploring fabric art techniques.
The book is acknowledged for its potential to inspire and complement workshops in textile art, offering a wide range of projects to try. With clear directions and techniques, it's described as an indispensable reference for upcycling textiles, providing easy-to-follow methods for altering fabric surfaces.
The book's illustrations aren't only clear but also spark creativity and innovation, making it a valuable resource for both beginners and experienced artists. For those looking to explore textile art, starting with this book can set a solid foundation and ignite a passion for fabric artistry.
Techniques and Creativity
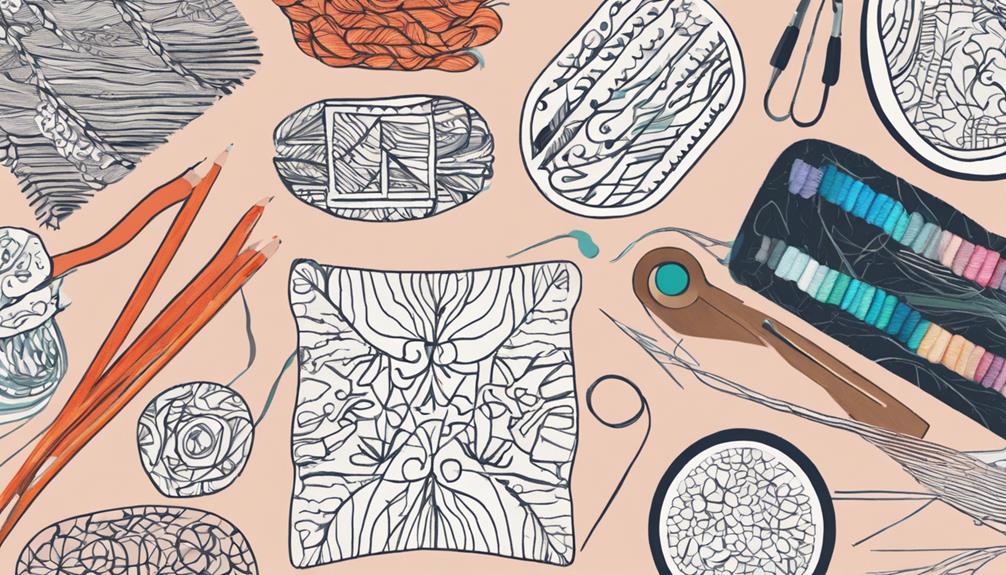
The exploration of textile art techniques and creativity in altering fabric surfaces is a cornerstone of fabric artistry. In this extensive resource, you'll find a variety of techniques well described to inspire creativity and innovation in fabric art.
Here's what you can expect:
- Step-by-step instructions: The focus is on providing clear explanations and tips for altering and embellishing fabric through various methods.
- Sourcing suggestions: Discover where to find the necessary materials and tools to enhance your fabric art projects.
- Explore and experiment: This art form encourages you to step out of your comfort zone and try new techniques to open up your creativity.
- Tips and project ideas: Whether you're a novice or an expert, you'll find a wealth of suggestions to help you enhance your creativity and create unique fabric art pieces.
Frequently Asked Questions
What Is a Textile Art?
Textile art involves using various techniques like weaving, knitting, and embroidery to create pieces that range from traditional to contemporary.
Artists explore color, texture, and form through textiles, which offer unique opportunities for artistic expression.
With a rich history dating back thousands of years, textile art continues to evolve as artists innovate and push boundaries.
Anni Albers and Ann Sutton are among contemporary artists blurring the lines between art and craft with innovative pieces.
Is Textile Art and Fiber Art the Same Thing?
When you think about the distinction between textile art and fiber art, it's like comparing a broad canvas to a specific brushstroke.
Textile art encompasses a wider spectrum, incorporating various materials beyond traditional fibers. While fiber art focuses on yarn and fabric, textile art embraces everything from paper to metal.
Textile art's versatility allows for a more diverse range of techniques and materials, pushing the boundaries beyond traditional fiber art practices.
What Are the Features of Textile Art?
Textile art features a diverse range of techniques like weaving, embroidery, quilting, knitting, and surface design. Through these methods, artists express themselves using color, texture, pattern, and form. Themes explored in textile art include identity, culture, history, and social issues.
Both traditional and contemporary approaches exist, blending craft with fine art and pushing boundaries in creative expression. These characteristics make textile art a versatile and impactful form of artistic communication.
How to Make a Textile Artwork?
To make a textile artwork, you can start by selecting your materials like fabric, yarn, or thread.
Next, you can choose a technique such as stitching, weaving, dyeing, quilting, or embroidery.
Experiment with different textures, colors, and patterns to create a unique piece that expresses your creativity.
Don't be afraid to mix and match techniques to achieve the desired effect.
Let your imagination run wild as you explore the world of textile art!
Conclusion
To sum up, textile art is a vibrant and dynamic medium that allows for endless creativity and expression.
As the saying goes, 'Art isn't what you see, but what you make others see.'
So go ahead, pick up a needle and thread, explore different techniques, and let your imagination run wild.
The world of textile art is waiting for you to create something truly unique and beautiful.
Let your creativity soar!
Textile Art
How to Textile Art: A Beginner’s Guide!
Hone your textile art skills with cotton and canvas, unraveling a world of creativity and inspiration waiting to be explored!
Embark on your textile art journey confidently by using cotton material for painting on a 260gm white cotton canvas base. Soften the material with water before painting and opt for fabric paints specifically designed for cotton. Wind threads into balls for storage, organize your needles, and invest in high-quality brands. Explore courses such as Brave With Color for $65, focusing on hand embroidery techniques. Boost creativity by personalizing your creative space. Utilize versatile cotton for projects, seek inspiration, and choose a color palette that resonates with you. Explore eco-friendly art by using leaves, flowers, and plant dyes. Keep a stitch log to efficiently manage threads and experiment with new techniques.
Key Takeaways
- Start with cotton fabric for versatility and paint adhesion.
- Explore different needle types for various stitching techniques.
- Utilize fabric paints designed for natural fibers like cotton.
- Consider eco-friendly techniques like eco-printing with plant materials.
- Keep a stitch journal for effective thread storage and project organization.
Top Tips for Textile Art Beginners
For beginners diving into the world of textile art, remember to carefully select the right fabric and paints for your projects. When working on textile art, cotton fabric is a fantastic choice due to its versatility and ability to hold paints well. Opt for a 260gm white cotton canvas for a sturdy base that can withstand various painting techniques and mediums.
To guarantee vibrant and long-lasting results, make certain to utilize fabric paints specifically designed to adhere well to natural fibers like cotton. Experimenting with fabric medium can enhance your artwork by adding flexibility and texture. Before painting on cotton fabric, consider softening it with water to achieve smooth and even coverage.
Additionally, if you want to add depth and dimension to your textile art creations, try layering lighter-weight fabrics on top of your cotton base. This technique can create visually appealing textures and enhance the overall aesthetic of your artwork.
Flourish Textile Art Tutorials
Discover the various courses offered by Flourish Textile Art Tutorials, including Brave With Colour and Monoprinting with free motion embroidery, each priced at $65. These tutorials cover techniques such as book making, mixed media on paper, and art journal basics.
Immerse yourself in the world of hand embroidery and unleash your creativity through intricate stitching and patterns. Flourish Textile Art Tutorials offer a special opportunity to learn and enhance your textile art skills in a supportive online environment.
In addition to the courses, explore 9 ways to create your own creative space and expand your textile artistry. Find inspiration in nature effortlessly and delve into detailed information with Small Print.
Stay up-to-date on new courses and events by joining the mailing list with your first name and email. Flourish Textile Art Tutorials provide an extensive platform for beginners to advance in the world of textile art.
Explore Creative Spaces in Textile Art
Discovering various creative spaces in textile art enhances artists' inspiration, focus, and experimentation with techniques and materials. These spaces, ranging from personal studios to outdoor settings like gardens or parks, serve as vital hubs where textile artists can immerse themselves in their craft. By providing a conducive environment, creative spaces play an important role in nurturing creativity and innovation within the domain of textile art.
Personalizing these spaces with tools, materials, and inspiring artworks creates a unique atmosphere that motivates artists to explore new ideas and push boundaries in their work. The layout and organization of a creative space aren't to be underestimated, as they can have a significant impact on an artist's workflow and productivity during textile art projects.
Whether it's a cozy studio nook or a sunlit garden corner, finding the right creative space can make all the difference in igniting your creativity and bringing your textile art visions to life.
Creative Days: Textile Art Projects
Start on your textile art journey by dedicating creative days to engaging in inspiring and theme-focused projects. When working on textile art projects, consider using versatile materials like cotton to bring your creations to life.
Begin by overcoming the fear of a blank canvas and draw inspiration from a variety of sources. Select a color palette that resonates with your theme and vision. Making decisions on the format, such as whether to start with the background or focal image, is essential for the success of your project.
Textile art projects can be based on storytelling themes, specific word themes, image ideas, or technique-based concepts. It's important to lay a strong foundation for your project by developing a well-thought-out concept and color scheme.
Eco-Printing Basics and Techniques
So, you're ready to explore the world of eco-printing!
With this technique, you'll be using natural materials like leaves and flowers to create beautiful patterns on fabric.
Get ready to embrace sustainable practices and let nature inspire your textile designs.
Natural Dyeing Process
Through eco-printing, you can create unique prints on fabric using leaves, flowers, and plant materials in a sustainable and eco-friendly manner. The natural dyeing process involves bundling thick cotton fabric with these materials and either steaming or boiling them to transfer their colors and patterns onto the fabric. This technique allows for a deep connection to nature and eliminates the need for harsh chemicals typically used in traditional dyeing methods.
- Variety of Materials: Leaves, flowers, and plant materials are commonly used for eco-printing.
- Steam or Boil Method: The colors and patterns from the natural materials are transferred to the fabric through steaming or boiling.
- Unique Results: Each eco-print is one-of-a-kind due to the variations in plant materials, resulting in truly unique and irreproducible prints.
With eco-printing, you have the freedom to experiment with different combinations of plant materials and techniques, offering endless possibilities for creating diverse colors and patterns in your textiles.
Plant-Based Pattern Creation
Utilizing natural plant materials, eco-printing is a creative technique that allows for the creation of intricate patterns on fabric through a sustainable and eco-friendly process. This method of mixed media art involves using leaves, flowers, and other plant materials to produce unique designs.
By bundling these natural elements with fabric and subjecting them to steaming or boiling, the colors and shapes from the plants are transferred onto the fabric, resulting in beautiful patterns.
Originating in the early 2000s, eco-printing emphasizes the use of renewable and sustainable resources, making it an environmentally conscious form of art. Each eco-print created is one-of-a-kind due to the variations in plant materials used, adding a special touch to every piece.
Artists have the freedom to experiment with different plant combinations and dyeing techniques, allowing for a wide range of colors and patterns in eco-printing. This sustainable and creative process offers endless possibilities for textile artists to explore and create stunning works of art.
Sustainable Fabric Design
Eco-printing, a natural dyeing technique, involves using leaves, flowers, and plant materials to create unique prints on fabric. This sustainable and eco-friendly method allows you to connect with nature while producing one-of-a-kind textile designs.
To get started with eco-printing, follow these easy-to-follow steps:
- Collect fresh leaves, flowers, and plant materials for your eco-printing project.
- Lay out a piece of fabric and arrange the natural materials on top to create your desired design.
- Bundle the fabric and plant materials tightly together before steaming or boiling them to transfer the colors and patterns onto the fabric.
Eco-printing offers a creative way to experiment with natural dyes and textures, all while minimizing environmental impact. Embrace the beauty of imperfection as each eco-printed piece is truly unique, showcasing the essence of the plants used in the process.
Thread Storage and Stitching Essentials
You can start by organizing your diverse thread collection for easy access.
Consider investing in quality needles like Tulip, Bohin, and John James for different types of stitching.
Keep in mind the importance of maintaining a stitch journal to track your progress and experiment with various needle sets.
Organizing Thread Collection
To maintain your thread collection organized and easily accessible, consider winding threads into balls or using straws for efficient storage. This starting point will help you keep an orderly workspace and prevent tangles in your threads.
Additionally, storing your threads in transparent containers or specialized thread organizers can further assist in keeping your collection neat and easily visible. Separately storing needles and stitching tools is crucial to avoid damage and guarantee quick access during your projects.
Investing in top-quality needles like Tulip, Bohin, or John James can enhance your stitching experience, providing smoother and more precise results. Explore different needle types such as sashiko, crewel, or sharps to find the most suitable option for your hand sewing projects.
Needle Types and Uses
Exploring various needle types and their specific uses is pivotal for effectively managing your thread storage and enhancing your stitching experience in textile art projects. Different types of needles, such as Tulip, Bohin, and John James, are recommended for various stitching purposes like hand sewing, sashiko, silk, crewel, quilting, and sharps.
Quality needles like Bohin offer benefits such as durability and smooth stitching, contributing to the overall success of your projects.
To cater to beginners, needle sets are available, allowing you to experiment with different needle sizes and types until you find the perfect match for your needs. Proper needle selection is vital for achieving the desired stitching results in textile art and embroidery projects.
Stitch Journal Importance
Keeping a stitch log is crucial to effectively managing your thread storage and necessary stitching tools in your textile art projects. This log serves as a valuable tool for tracking progress, experimenting with new techniques, and referencing favorite stitches.
Here's how it can help:
- Track Progress: Documenting your thread storage methods in the stitch log ensures organized and easy access to various thread types.
- Reference Essentials: Recording stitching essentials like needle types, tools, and materials in the log aids in maintaining a thorough inventory.
- Enhance Creativity: Stitch log entries can include notes on thread colors, textures, and brands for future reference in textile art projects.
Frequently Asked Questions
What Are the Basics of Textile Art?
To grasp the basics of textile art, start with understanding the various techniques like:
- Embroidery
- Quilting
- Applique
- Weaving
These methods allow for creative exploration of colors, textures, and patterns.
By mastering fabric manipulation techniques, you can craft unique pieces that blend traditional and contemporary styles.
With endless possibilities for expression, textile art offers a platform to release your artistic vision through the medium of fabrics and threads.
How to Make a Textile Artwork?
Crafting textile art is a creative journey that starts with selecting the perfect fabrics and paints to bring your vision to life.
Begin by choosing a sturdy canvas like 260gm white cotton to provide a solid foundation.
Experiment with fabric paints that adhere well to natural fibers for vibrant colors.
Add flexibility and durability with fabric medium.
What Is the Simplest Textile Art?
The simplest textile art involves basic hand stitching techniques using a needle and thread. You can start with easy embroidery stitches like the running stitch, backstitch, and satin stitch.
Textile art offers a range of creative possibilities, including fabric painting, applique, and fabric collage. Small projects like a hand-stitched bookmark or simple fabric painting can help you build confidence.
Experimenting with textures, colors, and materials can elevate your beginner textile art projects.
What Is the Difference Between Fiber Art and Textile Art?
When distinguishing between fiber art and textile art, it should be recognized that fiber art encompasses a wider range of materials beyond textiles, such as paper, metal, and wood.
On the other hand, textile art specifically focuses on creations made from fabrics like yarn and cloth.
Understanding this difference enables artists to explore unique mediums and techniques to express their creativity in distinct ways.
Conclusion
Congratulations on taking your first steps into the world of textile art!
Did you know that textile art has been around for thousands of years, with evidence of early forms dating back to prehistoric times?
Keep exploring, practicing, and honing your skills to create beautiful and unique pieces that reflect your creativity and passion.
Remember, the possibilities are endless in this versatile and timeless art form.
Happy stitching!
Textile Art
How to Price Textile Art: Tips for Artists!
Jumpstart your textile art pricing strategy with expert tips for setting profitable prices and ensuring fair compensation for your creative work!
When determining the price for your textile art, be sure to factor in your hourly rate, material costs, profit margin, and time invested. Take into consideration the amount of time it takes to create the piece, the level of intricacy and skill involved. Also think about the size, complexity, resources, and ensuring fair compensation for your work. Include overhead expenses such as studio rent, utilities, and marketing costs. Aim to set prices with a profit margin of 50-100%, research market rates, and keep your pricing competitive. It is crucial to ensure fair compensation for your art in order to succeed as an artist.
Key Takeaways
- Consider time, materials, expertise, and overhead costs.
- Calculate hourly rate, creation time, and material expenses.
- Factor in artwork size, complexity, and resource demands.
- Add 50-100% profit margin for fair compensation.
- Research market rates and set competitive prices.
Identifying Cost Factors
To price textile art effectively, you must carefully identify all cost factors involved in creating the artwork. When setting a price for your textile art, consider your hourly rate, material costs, profit margin, overhead costs, and the time invested in creating the piece.
Fiber artists should calculate their hourly rate by dividing the total time spent on a project by the desired profit margin. This guarantees that you're adequately compensated for your skill and time.
Material costs play a significant role in determining the final price of your textile art. Evaluate the type and quantity of materials required for each piece, especially considering that larger artworks may demand more resources.
Additionally, factor in any overhead costs, such as studio rent or utilities, to accurately price your artwork and secure a fair return on investment. By thoroughly evaluating these cost factors, you can confidently set prices that reflect the value of your unique textile creations.
Calculating Labor and Materials
Calculate your labor costs for textile art by determining your hourly rate and total creation time for each piece. Factor in your hourly wage to make sure you're compensated fairly for your time and effort.
Keep track of how much time you spend on each piece to accurately reflect the labor involved. Additionally, consider the material costs when pricing your artwork. Calculate the expenses for fabrics, threads, and any other supplies used in the creation process. This will help you set a price that reflects both the value of your labor and the materials invested.
As a textile designer, it's crucial to evaluate the intricacy of the design and the skill level required. These factors can influence the creation time and material costs, ultimately impacting the pricing of your artwork.
Considering Artwork Size and Complexity
How do the size and complexity of your textile artwork impact pricing decisions?
When figuring out the price of your work, it's crucial to take into account how much time and materials were used in creating it.
Larger pieces often demand more resources, like fabric and thread, which can raise the total cost.
Moreover, the intricacy of your design, including detailed elements and the level of expertise required, plays a substantial role in pricing adjustments.
Artists should bear in mind these factors to secure fair compensation for their efforts.
Factoring in Overhead Expenses
When pricing your textile art, factoring in overhead expenses is important for making sure that your pricing strategy reflects the total cost of creating your artwork.
Overhead expenses in textile art pricing may include studio rent, utilities, insurance, and marketing costs.
By understanding and accounting for these overhead expenses, artists can set competitive prices that cover all aspects of their business operations. This consideration is vital for developing sustainable pricing strategies in the textile art industry.
Including overhead expenses in your pricing calculations guarantees that you're compensated fairly for both your creative work and the essential business functions that support it.
Ultimately, incorporating these expenses into your pricing strategy not only benefits your business but also helps you maintain a competitive edge in the market while supporting your artistic endeavors.
Setting Profitable Prices
To secure you're appropriately compensated for your textile art commissions, it's crucial to set profitable prices that reflect the value of your creative work and account for various business considerations.
When determining your pricing strategy, consider adding a profit margin of 50% to 100% to guarantee fair compensation. Adjust this margin based on factors like effort, reputation, and market demand for a balanced approach.
Researching market rates will help you understand industry benchmarks and maintain competitive pricing in the textile art market. Effective pricing involves balancing costs, overhead expenses, and profit margin to accurately price your commissions.
Thorough calculations and market awareness are essential for developing sustainable pricing strategies that sustain your business in the long run. By carefully considering these factors and staying informed about market trends, you can set prices that not only value your work but also ensure profitability in your textile art business.
Frequently Asked Questions
How to Price Textile Art?
To price your textile art, consider all costs like materials, time, and overhead. Calculate labor and material expenses, factoring in hourly rates and creation time. Assess size and complexity for accurate pricing adjustments.
Add a 50% to 100% profit margin for fair compensation. Research market rates and industry benchmarks to stay competitive. Adjust pricing based on demand and reputation.
Following these steps guarantees a sustainable pricing strategy for your textile art.
What Is the Formula for Art Pricing?
When determining art prices, remember the formula: ((hourly wage rate x 3) + material) x 2.
This formula simplifies the process, helping you set a baseline for pricing your pieces.
By following this structure, you can calculate prices ranging from €435 to €968, giving you a clear starting point.
How Should an Artist Price Their Work?
When pricing your work, consider all costs, like materials, time, and training. Calculate labor and material costs with hourly rates and total time spent creating.
Factor in size and complexity for accurate pricing. Add a profit margin of 50% to 100% for fair compensation, adjusting based on effort, reputation, and demand.
Conduct market research to understand industry standards and competitive rates. This approach will help you set prices that reflect the value of your textile art.
How Much Should I Charge Someone for My Art?
When setting prices for your art, consider all costs, calculate a fair hourly rate, and research market rates to stay competitive.
Factor in effort, reputation, and demand to adjust profit margins. Public art commissions with larger budgets can impact pricing strategies.
Building a strong reputation through such projects can lead to more opportunities and increased pricing potential.
Tailor your pricing based on your unique art, market demand, and the value you bring to each piece.
Conclusion
Now that you've considered all the cost factors, calculated labor and materials, and factored in overhead expenses, it's time to set profitable prices for your textile art.
Remember, size and complexity play a role in pricing, so don't forget to take those into account.
By following these tips, you'll be able to confidently price your artwork and guarantee that you're being compensated fairly for your talent and hard work.
Good luck!
Textile Art
How to Mount Textile Art: Step-by-Step Instructions!
Curate a stunning display for your textile art by following step-by-step mounting instructions that ensure a secure and presentable presentation.
To begin mounting textile art, first gather stretched canvas, acrylic paint, foam brush, awl, clear monofilament thread, and chalk pencil. Prepare the canvas using facing techniques and secure the textile in place using stitching methods such as back-stitching. If working with delicate fabrics, sew using light silk thread and consider seeking professional assistance for restoration. Adapt your mounting approach based on the specific design of the artwork, taking into account sculptural relief and dimensions. Following these steps will ensure a secure and attractive display for your textile art.
Key Takeaways
- Prepare stretched canvas with acrylic paint and holes for attachment.
- Anchor textile with monofilament thread using back-stitching for security.
- Securely attach textile art to canvas with invisible running stitches.
- Opt for light silk thread for delicate fabrics on fabric-covered mount board.
- Consult textile conservators for professional restoration and conservation advice.
Tools and Materials
Gather necessary tools and materials before commencing the process of mounting textile art to guarantee a professional display outcome. For this project, you'll need a stretched canvas, acrylic paint, foam brush, awl, large sharp needle, clear monofilament thread, scissors, ruler, and chalk pencil.
Acrylic paint plays a vital role in the process as it's used to paint the sides and edges of the canvas. This step ensures a cohesive look for your textile art display.
When attaching the textile art to the canvas, make sure to use thread that matches the edge of the artwork. This thread won't only secure the textile art firmly to the canvas but also provide a seamless finish.
Preparation of Textile Work
Consider incorporating facing techniques like Wholecloth Facing or Mitred Facing to achieve clean edges on your textile art piece before mounting it.
These methods involve adding a fabric border around your artwork, providing a neat finish and stability during the mounting process.
Additionally, leave a hanging sleeve on the textile art to make the mounting process easier.
Make sure that the depth of the facing edge matches the requirements for attaching the textile art to the canvas securely.
When preparing your textile work, explore different methods to secure it onto the stretched canvas effectively.
You can use pins, clips, or fabric-friendly adhesives for this purpose.
To guide the attachment process, use a chalk pencil to mark the positions for stitching holes on the canvas, ensuring accurate placement.
Preparation of Stretched Canvas
For proper mounting of your textile art, make sure that the stretched canvas is equal to or larger than the artwork's size. When preparing the stretched canvas for your textile art pieces, there are several key steps to follow. Consider the canvas type, as different types may impact the ease of stitching your artwork onto it. To enhance the overall presentation, it's recommended to paint the sides and edges of the canvas with acrylic paint. Additionally, piercing holes along the edge of the canvas is crucial to prepare for stitching the textile artwork. Marking positions for these holes on the canvas is essential to ensure they align with the facing depth or your personal preferences for attachment.
Preparation Steps for Stretched Canvas | |
---|---|
Choose canvas equal or larger than textile work | Consider different canvas types |
Paint sides and edges with acrylic paint | Pierce holes along canvas edge |
Mark positions for holes on canvas | Ensure alignment with facing depth |
Attaching the Textile Work
You'll learn about different stitching techniques to safeguard your textile work to the canvas effectively. Master how to anchor the thread securely, experimenting with stitch spacing for a reliable attachment.
Guarantee a clean and professional finish by back-stitching, knotting the thread, and using invisible monofilament thread for a tidy look.
Stitching Techniques Overview
How can you effectively fasten textile art to a canvas using sewing techniques?
Sewing techniques play an essential role in securely mounting textile art. To begin, anchor monofilament thread firmly within the textile work. The textile is then sewn onto the canvas using a running stitch. Experiment with different stitch spacings and consider back-stitching for a secure and taut outcome.
Opt for invisible monofilament thread for a neat and tidy finish as it allows for easy removal if needed. Proper sewing ensures that the textile art is securely and professionally mounted on the canvas, showcasing your work in the best light.
Securing Textile to Canvas
To firmly attach textile art to a canvas, start by anchoring monofilament thread within the textile work before using a running stitch to fasten it to the canvas. When mounting small textiles, make certain the thread is anchored securely in the textile piece to provide a strong foundation for stitching.
Begin by positioning the textile on the canvas and threading a needle with the monofilament thread. Implement a running stitch along the edges of the textile, adjusting the spacing as needed to maintain a smooth and even attachment. Back-stitch at the end of the running stitch to secure the thread, making sure the textile is taut against the canvas.
Knot the thread securely to prevent any loosening over time. For a professional finish, consider using invisible monofilament thread for stitching, enabling easy removal if required. Experiment with different stitching techniques to find the most effective method for firmly attaching your textile art to the canvas.
Neat Finishing Details
For a polished appearance, use transparent monofilament thread to seamlessly affix the textile work to the canvas, guaranteeing a crisp and expert finish.
To accomplish precise finishing touches, secure the thread firmly in the textile piece before employing the running stitch technique to fasten it to the canvas. Adjust the stitch spacing as necessary to secure the textile piece firmly. Utilize back-stitching and knotting the thread to uphold tension and prevent any movement of the artwork over time.
Opting for clear monofilament thread delivers an unseen finish, simplifying the removal of the textile art if needed in the future without any visible marks. This method not only secures a clean appearance but also enhances the durability of the mounted textile piece.
Reader Interactions
Let's chat about the points highlighted in this article – Artwork Display Methods and Audience Engagement Opportunities.
What methods have you found effective in showcasing textile art?
Share your thoughts on how to best engage with fellow enthusiasts in the textile art community.
Let's exchange tips and ideas to enhance our experience with mounting and displaying textile pieces.
Artwork Display Methods
Engage with fellow readers to exchange ideas and insights on displaying your fiber art pieces. Share your thoughts on different methods of presenting textile art to create visually appealing displays. Whether you prefer traditional hanging techniques or innovative installations, discussing your experiences with displaying fiber art can inspire others in the community.
By subscribing for updates and a free email course, you can stay informed about the latest trends and techniques in artwork presentation. Don't hesitate to leave comments to address any challenges you may encounter while showcasing your fiber art. Engaging with the post through comments fosters a sense of community and allows for a fruitful discussion on the nuances of displaying textile art.
Remember that technical issues like encountering an error message during submission can happen, but don't let that deter you from participating in the conversation. Your input is valuable in creating a supportive environment where artists can learn from each other's experiences.
Audience Engagement Opportunities
How can you actively participate in the conversation about displaying your fiber art pieces with fellow readers? Engage with the community by sharing your unique methods for showcasing textile art and discussing any challenges you may have encountered. Your insights can inspire others and create a valuable exchange of ideas on displaying textile art. Don't miss out on the opportunity to connect with like-minded individuals who share your passion for creativity.
Additionally, make sure to take advantage of the subscription option available for updates and a free email course on mounting textile art. By subscribing, you can stay informed about the latest trends and techniques in the art world, enhancing your knowledge and skills in displaying your artwork effectively.
Techniques for Sewing and Mounting
Consider selecting a lighter thread than the fabric itself for a seamless finish when sewing textile art. This choice guarantees that the stitches blend in with the textile work, enhancing its overall appearance. For delicate silk fabrics, opt for a light silk thread to avoid any damage or strain on the material.
When mounting your textile art, sewing it onto a fabric-covered mount board provides stability and support, preventing any sagging or warping over time.
To secure the preservation of your artwork, engaging a textile conservator for precise mounting techniques is recommended. They've the expertise to handle delicate textiles and use methods like lacing techniques or the 'Newbury method' for secure and professional mounting.
Restoration and Conservation
When restoring and conserving textile art, it's important to consult with textile conservators for professional guidance and expertise in preserving delicate pieces effectively. Textile conservators possess the skills to restore damaged cloth pieces using invisible stitching patterns, guaranteeing a seamless finish that preserves the artwork's original beauty. Seeking professional advice is vital in addressing any fading or damage to the textile before mounting, ensuring proper conservation for future generations to appreciate.
In restoration and conservation, utilizing diagrams illustrating stitching techniques can aid in reducing the weight on fragile textiles, preventing further harm. These techniques not only restore the textile but also contribute to its longevity. Proper mounting techniques play a significant role in alleviating stress on the artwork and maintaining its integrity over time.
Artwork Size and Design Considerations
Assess the sculptural relief or sewn borders of your textile art to determine the appropriate mounting method to enhance its presentation effectively. When examining the size and design elements of your textile piece, it's essential to tailor the mounting technique to best showcase its unique characteristics. Take into consideration the overall dimensions, texture, and structural components of the artwork to select the most suitable framing approach.
To help you make an informed decision, here is a table highlighting key points to keep in mind when mounting textile art:
Textile Piece | Design Elements | Mounting Technique |
---|---|---|
Sculptural Relief | Intricate patterns | Shadow box framing |
Sewn Borders | Bold colors | Floating mount |
Large Size | Textured fabric | Custom stretcher bars |
Frequently Asked Questions
How Do You Mount Textiles?
To mount textiles, fasten them with clear monofilament thread using a running stitch on a stretched canvas. Knot the thread for tension, experimenting with stitch spacing and back-stitching for a neat look.
Consider painting the canvas sides to complement the artwork. Use invisible thread for tidiness and easy removal. Anchor the thread in the textile piece for a firm attachment.
This method guarantees your textile art stays beautifully displayed.
What Is the Best Way to Hang Fabric Art?
When it comes to hanging fabric art, the best way is to utilize a stretched canvas and velcro strips for a polished look.
Seamlessly attach fabric by sewing velcro onto facing strips and then adhering it to the canvas.
Don't forget to add hanging hardware for easy installation.
Engage with fellow art enthusiasts to brainstorm innovative ways to showcase your textile pieces creatively.
Share your challenges and triumphs for a collaborative experience.
How to Mount a Fabric Picture?
To mount a fabric picture, select a canvas larger than your art. Attach the fabric with monofilament thread for a seamless look. Paint the canvas edges to complement the artwork.
Sign and date your creation, add hanging wire securely, and protect the ends. Experiment with facing or velcro strips for a polished finish.
These steps guarantee your fabric art looks professional and remains securely mounted for all to admire.
How to Mount Fabric to Canvas?
Fasten fabric to canvas flawlessly with finesse.
First, position your textile piece on the canvas, ensuring a smooth fit.
Then, use a running stitch with thread that matches impeccably.
Securely attach the fabric to the canvas, providing a professional touch.
Finally, add hanging wire, sign, date, and safeguard wire ends for a polished display.
Elevate your textile art with these simple steps for a stunning finished product!
Conclusion
To wrap up, mounting textile art demands meticulous preparation and attention to detail. Did you know that the typical dimensions of a textile artwork are 20×20 inches?
By adhering to the detailed guidelines provided in this article, you can proudly exhibit your textile creations for everyone to appreciate. Keep in mind the dimensions and design of your artwork when selecting a mounting technique to guarantee its longevity and beauty.
-
Textile Art6 days ago
How to Mount Textile Art: Step-by-Step Instructions!
-
Textile Art6 days ago
How to Textile Art: A Beginner’s Guide!
-
Vetted5 months ago
15 Best Crochet Styles for Locs to Elevate Your Look
-
Vetted5 months ago
15 Best Crochet Books for Beginners to Kickstart Your Crafting Journey
-
Vetted5 months ago
15 Best Crochet Hairstyles for a Stylish and Trendy Look
-
Vetted5 months ago
15 Best Knitting Patterns for Olive Green Sweaters
-
Textile Art6 days ago
How to Price Textile Art: Tips for Artists!
-
Vetted5 months ago
15 Best Knitting Kits for Beginners to Kickstart Your Crafting Journey