To prevent thread breaks in your serger, start by using high-quality thread that matches your fabric type. Adjust your tension settings carefully; too tight or too loose can cause issues. Make sure you’re threading your machine correctly and keep up with regular maintenance, like cleaning and lubricating. These quick fixes can greatly enhance your sewing experience. Stick around to uncover more tips and tricks for a smoother, hassle-free serging process.
Key Takeaways
- Use high-quality, compatible thread that matches your fabric type to minimize breakage and ensure smooth sewing.
- Regularly check and adjust tension settings based on fabric weight to prevent loops or thread strain.
- Follow proper threading techniques, ensuring threads are correctly placed and free from twists or knots.
- Implement a maintenance routine by cleaning and lubricating your serger to reduce dust buildup and ensure optimal performance.
- Test on scrap fabric to troubleshoot thread compatibility and tension settings before starting your project.

AK Trading 4-Pack White All Purpose Sewing Thread Cones (6000 Yards Each) of High Tensile Polyester Thread Spools for Sewing, Quilting, Serger Machines, Overlock, Merrow & Hand Embroidery
ALL PURPOSE THREAD – 4 Cones of Polyester Threads for Sewing Quilting Serger Color as shown. Over 30…
As an affiliate, we earn on qualifying purchases.
As an affiliate, we earn on qualifying purchases.
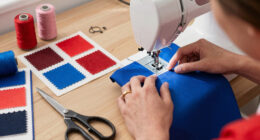
Why Is My Serger Thread Breaking?
When you notice your serger thread breaking, it can be frustrating, especially when you’re in the groove of a project. One major reason for this issue is thread quality. Using low-quality thread can lead to more frequent breaks, so always opt for reputable brands. Additionally, fabric compatibility plays a vital role. If you’re working with thick or textured fabrics, the thread might struggle to keep up, causing it to snap. Make certain the thread you choose matches the fabric type to maintain smooth sewing. Regularly check your tension settings, as incorrect tension can also contribute to thread breaks. By addressing these factors, you can reduce the chances of interruptions and keep your project flowing smoothly.

Haofy 6PCS Industrial Overlock Sewing Machine Screwdriver Kit Heat Treated Slotted Cross Head, Precise Needle Plate Repair Tool Set for Serger Maintenance Tension Adjustment
[Needle Plate Access] Thin blade slotted screwdriver reaches needle plate screws on industrial overlockers, eliminating frustrating slips during…
As an affiliate, we earn on qualifying purchases.
As an affiliate, we earn on qualifying purchases.
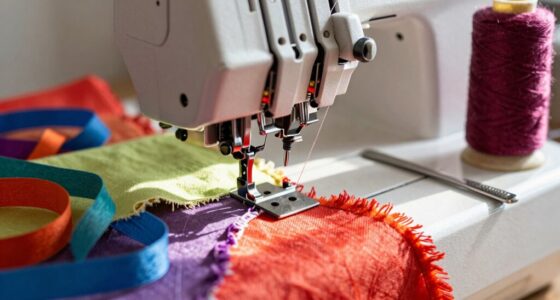
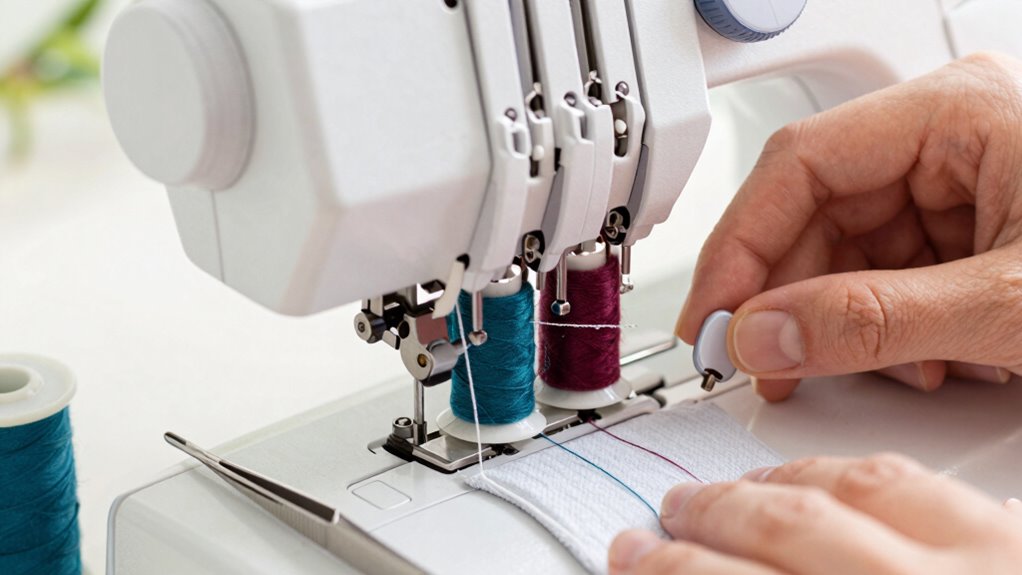
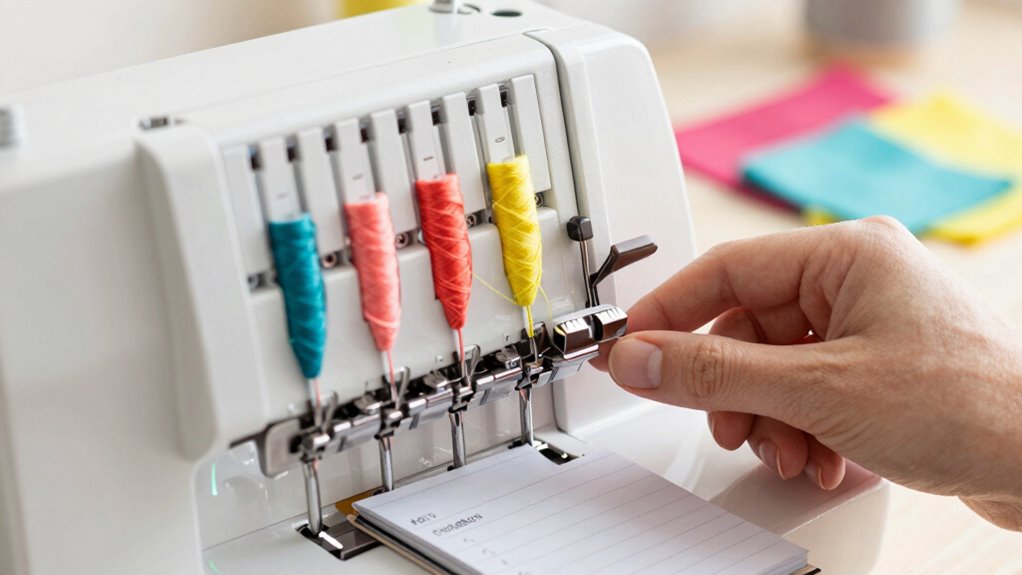
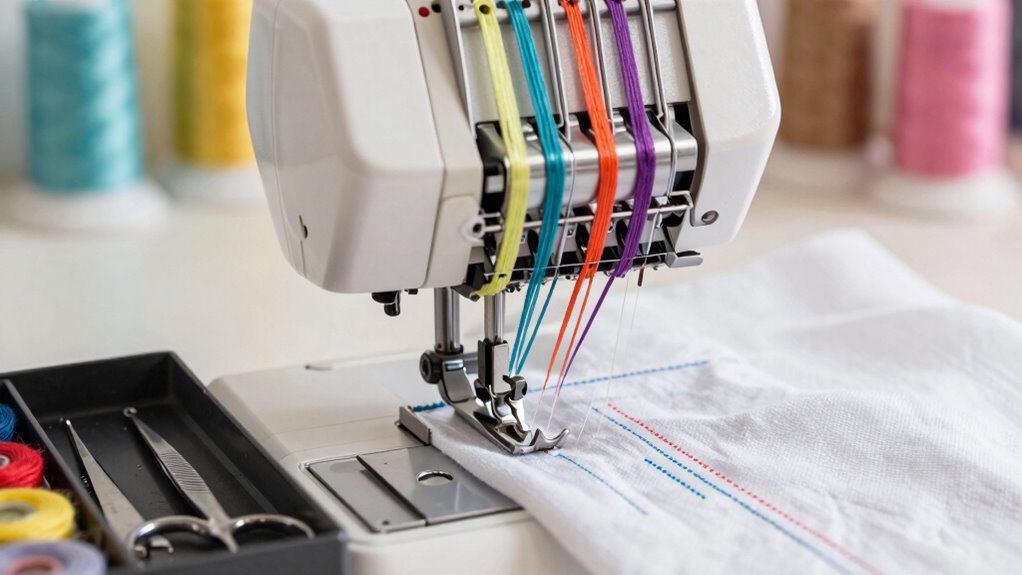
Proper Threading Techniques for a Smooth Sew
Achieving a smooth sew starts with proper threading techniques. First, always follow the correct threading order as indicated in your serger’s manual. This guarantees each thread engages properly, reducing the chance of breaks. Make sure each thread is securely placed in its tension disc; a loose thread can lead to inconsistent tension balance. When threading, pull gently to avoid knots or tangles that can disrupt your workflow. After threading, check for any twists or loops that could snag. Remember, a well-threaded machine operates more smoothly, allowing you to focus on your projects without interruptions. Additionally, understanding filtration basics can help you maintain a clean sewing environment, which further reduces the likelihood of thread breaks. By mastering these techniques, you’ll set the stage for a successful sewing experience with fewer thread breaks. Additionally, using an anti-fatigue mat can improve your comfort and focus while sewing, further minimizing disruptions.

Serger Needle Threader,overlocker Threader Set,for Looper and Needle by Hemline,2 Set Serger Looper Threader and Serger Needle Threader
【High-quality material】 It is made of high-quality ABS plastic and metal, with fine workmanship, durability and long service…
As an affiliate, we earn on qualifying purchases.
As an affiliate, we earn on qualifying purchases.
Adjusting Tension Settings for Better Thread Performance
Sure! Here’s the revised content with your requested adjustments:
—
Even with proper threading, tension settings play a significant role in preventing thread breaks. Start by checking your tension calibration; it should match the type of fabric and thread you’re using. If your threads aren’t consistent in their appearance, it’s a sign you need to adjust the tension. Lower tension can cause loops and fraying, while too much tension can lead to breakage. Testing on a scrap piece can help you find the sweet spot for thread consistency. Don’t hesitate to make small adjustments, as even minor changes can have a big impact. Remember, regular calibration guarantees your serger operates smoothly, allowing you to focus on creating without the frustration of constant thread breaks. Additionally, understanding kitchen appliance maintenance can enhance your overall sewing experience. Furthermore, maintaining a high contrast ratio can help you evaluate your thread’s appearance against different fabrics. It’s also beneficial to consider your budget for new threads, as investing in quality materials can improve performance and reduce breakage. Moreover, keeping an eye on indoor air quality can create a healthier sewing environment, reducing allergens and enhancing your overall comfort while you work. Additionally, practicing self-awareness techniques can help you recognize when stress affects your sewing, allowing for timely breaks to maintain focus and creativity.
—
Let me know if you need any more adjustments!

6 Piece Serger Sewing Machine Cleaning Repair Tool, Tweezers Double Headed Lint Brush Screwdrivers for Repair Overlock, Serger Service and More Sewing Machines
Precision Screwdrivers for Serger Adjustments: Our 6 Piece Serger Sewing Machine Cleaning Repair Tool features 2.8mm & 4.5mm…
As an affiliate, we earn on qualifying purchases.
As an affiliate, we earn on qualifying purchases.
The Right Needle Size and Type for Your Serger
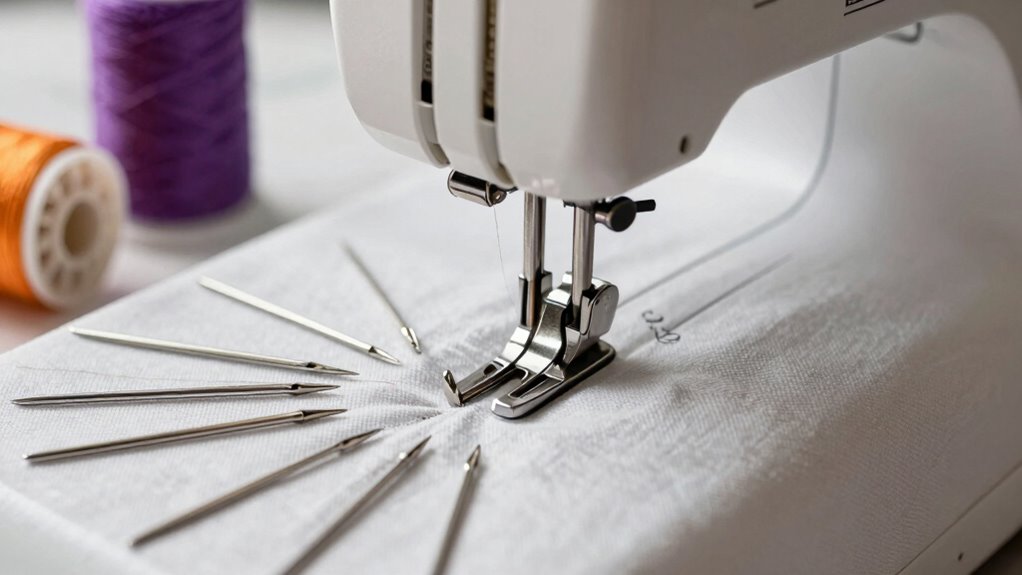
Choosing the right needle size and type for your serger can make all the difference in your sewing experience. Your needle selection should match the fabric compatibility for ideal results. If you’re working with lightweight fabrics, use a finer needle, like a size 70/10. For medium-weight fabrics, a size 80/12 works best, while heavier fabrics benefit from a size 90/14 or even larger. Additionally, consider using special needles, like ballpoint or stretch needles, for knit fabrics to prevent snags. Always replace dull or damaged needles, as they can cause thread breaks. By ensuring you’ve got the right needle, you’ll reduce frustrations and enjoy smoother stitching with your serger.
Maintaining Your Serger for Best Performance
To keep your serger running smoothly, you need a solid maintenance routine. Regular cleaning, proper lubrication, and adjusting thread tension can make a big difference in performance. Additionally, utilizing HEPA filters in your workspace can help reduce dust and lint buildup, which can also contribute to thread breaks. Implementing a routine to check and clean filters regularly can further enhance your sewing environment and minimize disruptions. It’s also important to be aware of water damage that can affect your equipment, as moisture can lead to rust or corrosion. Regularly inspecting your workspace for potential hazards can further ensure a safe and efficient sewing experience. Keeping your sewing area well-ventilated can also help reduce humidity levels, which are critical for maintaining optimal thread performance. Let’s explore how these simple steps can prevent frustrating thread breaks.
Regular Cleaning Routine
Sure! Here’s the revised content following your instructions:
—
When you make regular cleaning a priority, your serger will run more smoothly and efficiently. Establishing a cleaning schedule helps prevent dust accumulation, which can lead to thread breaks. Aim to clean your serger after every few projects or weekly, depending on your usage. Additionally, just like smart home technology optimizes performance through regular maintenance, your serger benefits from consistent care. Regular maintenance is crucial for maximizing efficiency and ensuring longevity. Acoustic treatments can also enhance the overall environment, making the sewing experience more enjoyable. Incorporating evidence-based practices into your cleaning routine can further enhance the performance of your serger. Moreover, maintaining a clean environment contributes to better indoor air quality, which can also positively affect your sewing creativity.
Here’s a quick reference table to help you stay on track:
| Cleaning Task | Frequency |
|---|---|
| Remove lint and dust | After each project |
| Check thread tension | Weekly |
| Clean feed dogs | Bi-weekly |
| Inspect needle area | Monthly |
Stick to this routine, and you’ll notice improved performance and fewer thread issues. Regular attention keeps your serger in tip-top shape, ensuring a more enjoyable sewing experience!
Lubrication and Maintenance
Lubricating your serger regularly is essential for maintaining its performance and longevity. Using a quality thread lubricant helps reduce friction, ensuring smooth operation and preventing thread breaks. Incorporate lubrication into your maintenance schedule to keep your serger in top shape. Check the manual for specific lubrication points and recommended products; following these guidelines will help you avoid unnecessary wear and tear.
Before applying lubricant, make sure your serger is clean and free of lint. A little goes a long way, so don’t overdo it. After lubrication, run your serger on scrap fabric to distribute the lubricant evenly. By prioritizing lubrication, you’ll enhance your serger’s efficiency and enjoy more successful sewing sessions.
Thread Tension Adjustment
Adjusting thread tension is essential for your serger’s performance, as it directly impacts stitch quality. Proper tension guarantees that your stitches are balanced and prevents thread breaks. Start by checking the thread quality and make certain it’s compatible with your fabric. If you’re using a lightweight fabric, you might need to loosen the tension; for heavier fabrics, tighten it slightly.
Here’s a quick reference table for your adjustment needs:
| Fabric Type | Recommended Tension | Thread Quality |
|---|---|---|
| Lightweight | Lower | Fine threads |
| Medium Weight | Medium | Standard threads |
| Heavyweight | Higher | Strong threads |
Why Threading Right Matters for Your Serger
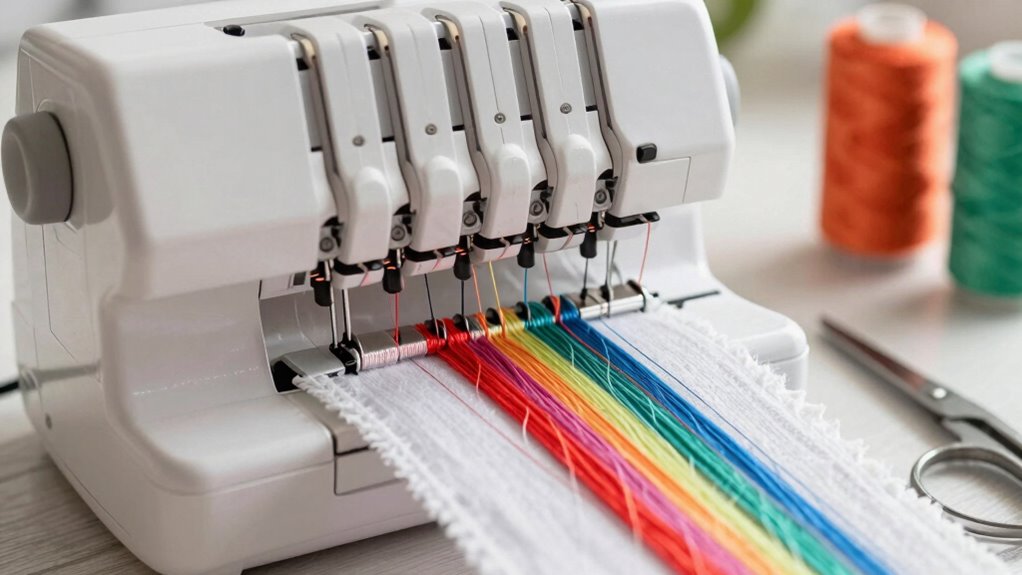
Threading your serger correctly is essential, as improper threading can lead to frustrating thread breaks and uneven stitches. Using the right threading techniques guarantees that your threads align properly through the tension discs and guides. When threads aren’t aligned correctly, they can snag or pull, causing breaks that interrupt your sewing flow.
Moreover, proper thread alignment affects stitch quality. If your threads aren’t seated correctly, you might notice skipped stitches or excess fraying. Taking a moment to double-check your threading can save you time and hassle later on. Remember, a well-threaded serger is key to achieving smooth, professional results in your projects. So, invest a bit of effort into threading right, and you’ll enjoy a more seamless sewing experience.
Quick Fixes to Prevent Frequent Thread Breaks

Even with proper threading, you might still encounter frustrating thread breaks. Start by checking the thread quality; low-quality threads can snag or break easily. Invest in good thread to guarantee smooth stitching. Next, assess the fabric compatibility. Not every thread works well with every fabric, so make sure you’re using the right combination. For instance, thicker fabrics may require heavier thread.
Also, adjust the tension settings on your serger. If it’s too tight, it’ll strain the thread and cause breaks. Finally, regularly clean your machine. Dust and lint can hinder performance, leading to more issues. By implementing these quick fixes, you’ll reduce the frequency of thread breaks and enjoy a smoother sewing experience.
Frequently Asked Questions
Can Using Old Thread Cause Breaks in My Serger?
Yes, using old thread can definitely cause breaks in your serger. Over time, thread quality diminishes, leading to fraying and brittleness. This can mess with your tension settings, making it harder for your machine to maintain consistent stitches. To prevent issues, always check the age and condition of your thread before starting a project. Fresh, high-quality thread guarantees smoother operation and helps keep your serger running without interruptions.
How Often Should I Replace My Serger’s Needles?
You should replace your serger’s needles every 8-10 hours of sewing. Remember, “a stitch in time saves nine.” For effective needle maintenance, keep a needle compatibility guide handy to guarantee you’re using the right type for your fabric. Regularly changing needles not only prevents breaks but also enhances your sewing quality. Don’t wait for issues to arise—stay proactive and keep your serger running smoothly.
Does the Type of Fabric Affect Thread Breakage?
Yes, the type of fabric definitely affects thread breakage. Fabrics with different compositions, like cotton or polyester, can influence how your thread interacts with the needle and tension settings. If you’re using a heavier fabric, you might need to adjust your sewing tension to prevent strain on the thread. Always test on a scrap piece first to find the right balance, ensuring smooth stitching without unexpected breaks.
Can Environmental Factors Contribute to Thread Issues?
Absolutely, environmental factors can mess with your thread. If you don’t keep humidity control in check, moisture can weaken the thread, causing breaks. Temperature variations can also play a role; extreme heat or cold might affect the thread’s elasticity. So, keep your workspace comfortable, like a cozy coffee shop, and you’ll notice fewer issues. Paying attention to these factors can make a big difference in your sewing experience!
What Should I Do if My Serger Is Still Under Warranty?
If your serger’s still under warranty, don’t hesitate to contact the manufacturer or retailer for support. Check your warranty coverage details to verify you’re eligible for repairs or replacements. Follow any maintenance tips they provide to keep your machine in top shape. Document any issues you encounter, as this can help during the warranty process. Remember, you’ve got a safety net, so make the most of it!
Conclusion
By taking these steps, you’ll transform your sewing experience from frustration to joy. Picture smooth, uninterrupted stitches flowing like a gentle river, each thread holding strong as you create your masterpiece. With a little care and attention, your serger can become a reliable companion, turning every project into a celebration of creativity. So, let’s banish those pesky thread breaks and embrace the thrill of sewing with confidence and ease! Happy serging!